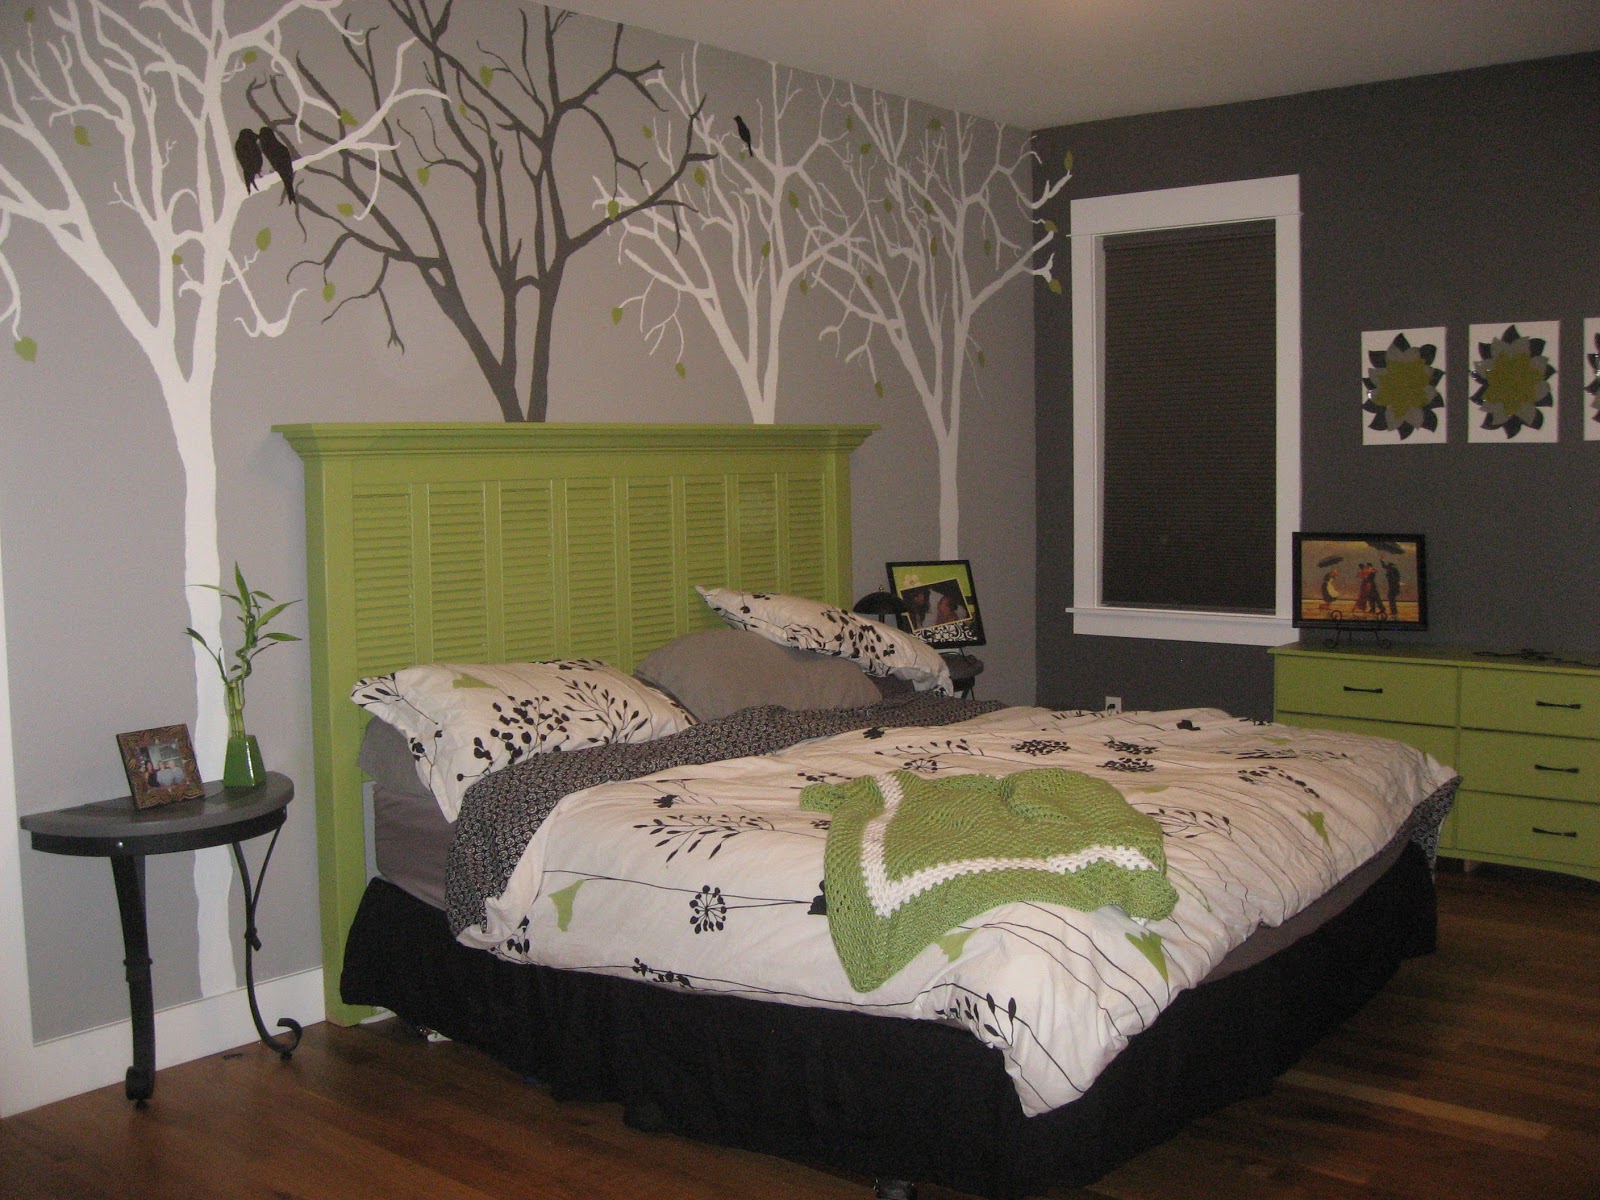
I've always wanted to make my own headboard!
So when I found some old shutters at the Habitat Store....
I KNEW exactly what I wanted to do with them!

 I
II lost most of my 'before' photos so I'll do my best
to try and explain what the hubby did and used.
I've yet to conquer power tools so the hubby did most of the work.
He used
Two 8 ft 2x6 's for the frame
Two 5 ft 4x4's for the post
One 1x8 as topper
and some Crown Molding
All this wood we had on hand so the Crown Molding was the only thing we had to purchase
I'm so bummed I can't show you all the photos I took of this process:(
This headboard measures 5ft tall and 7ft 4in wide
We have a King size bed so he cut the 2 sets of shutters in half
He simply cut a groove down the 2x6's the width of the shutters about 3/4".
Then he placed the shutters down into the grooves and clamped down the top 2x6.....
no glue or nails needed for this step
Then he grooved out the sides of the 4x4 posts and screwed the framed shutters in place.
Next he screwed down the 1x8 on top
Then he made end caps with the Crown Molding and nailed in place. The rest of the Crown Molding was nailed to the top of frame and under the 1x8.
Last step before paint was to fill the end cap seams and nail holes
with wood filler and sand.


I was torn between painting the headboard black or green.....

Green won!

This headboard is sturdy and strong enough that it just stands against the wall and we pushed the bed back in place.
My Master Bedroom Makeover is almost complete!
 another sneak peak ...........
Beautiful! I have 3-4 sets of shutters for this project. Love how substantial it looks.
ReplyDelete