Mouldings: An Easy How To
Mouldings can take furniture, cabinets, walls, etc. from boring & plain to being custom & beautiful. I was a little intimidated the first time I cut mouldings...but I knew I would get the hang of it. Now, I am cutting mouldings all of the time!

First, I will quickly show you how to cut mouldings to create a frame...framing out a door/window, picture framing, etc.

1
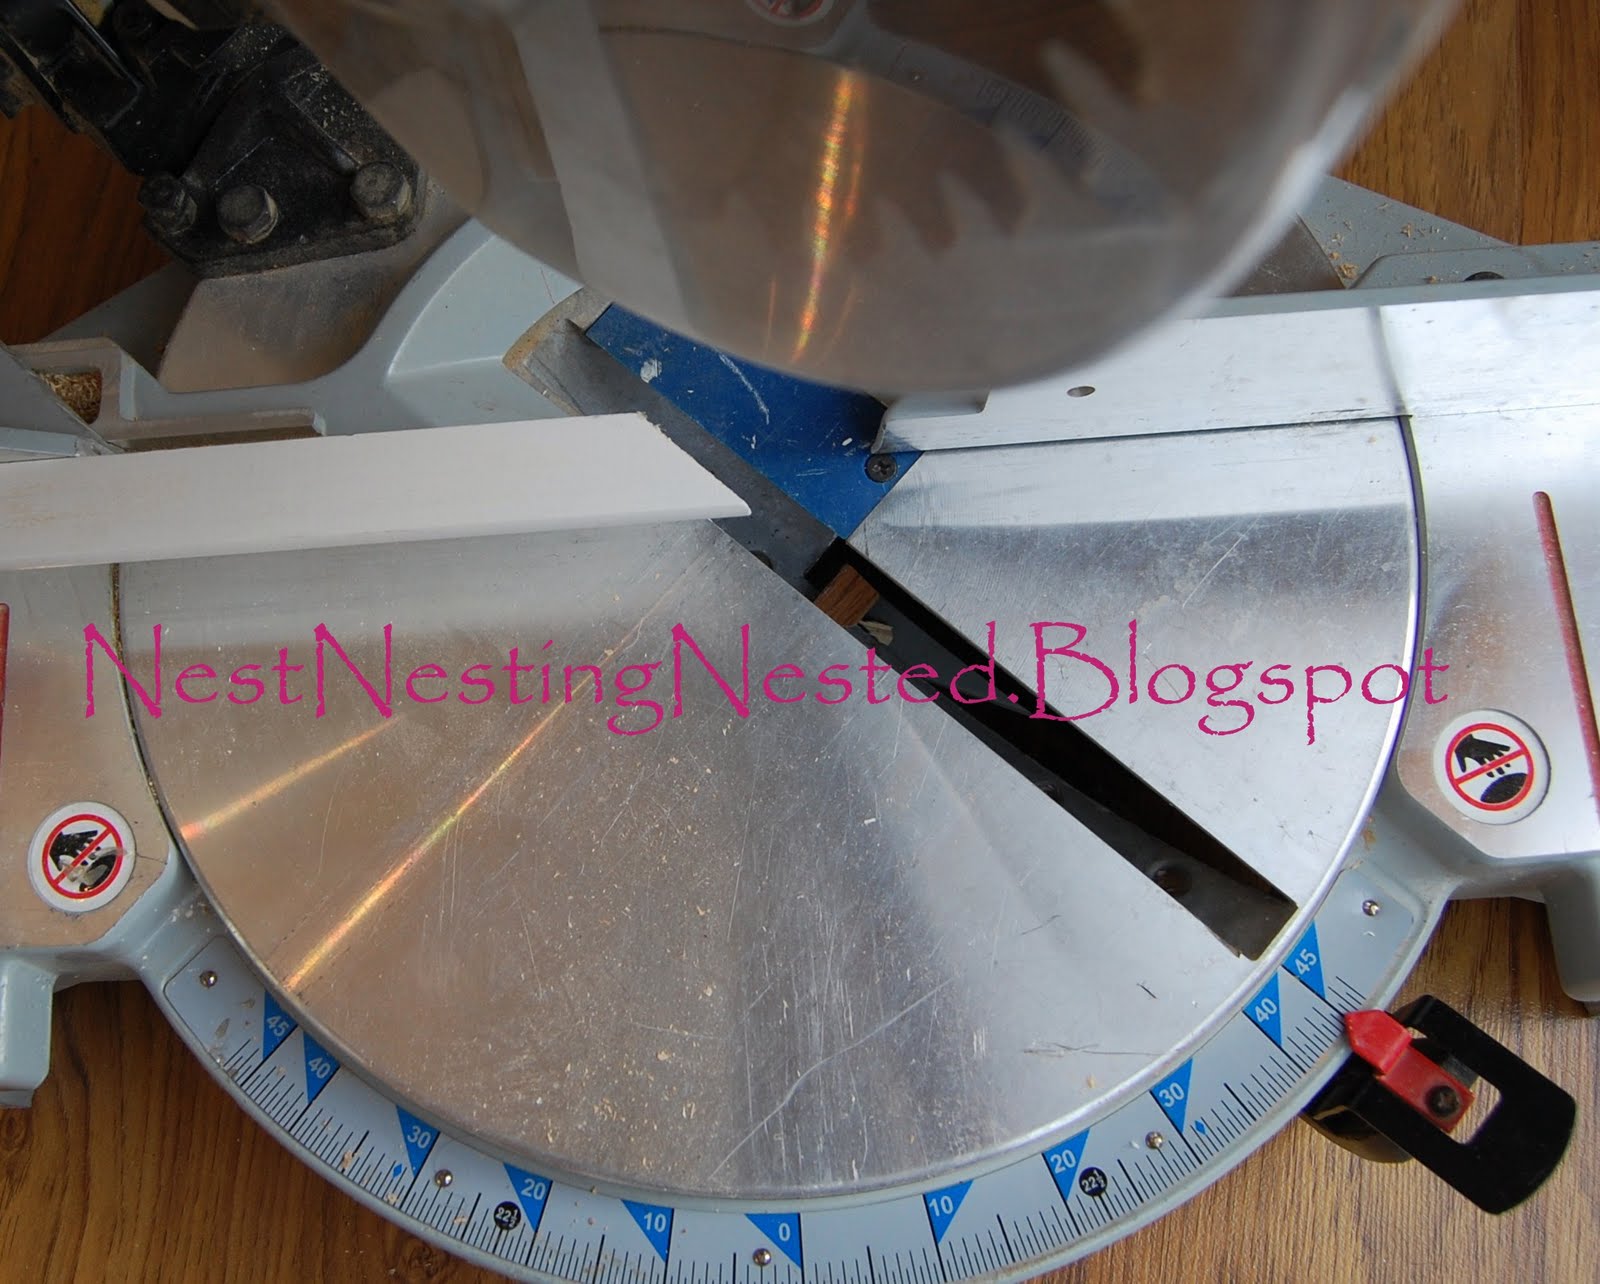
Set the miter angle at 45 degrees to the left
2
Place your moulding face up and flush with the fence of your saw.
3
Make your cut.
4
Reposition your miter angle to 45 degrees to the right
5
Cut the opposite end of the same moulding that you just cut.
6
Repeat 4 times to make a full square.
 I cut mouldings to frame out the beadboard on my bathroom
cabinet that I recently updated.
For full tutorial on this cabinet, check out my tutorial page at the top of my blog.
 ~~~~~~~~Next, how to cut mouldings such as baseboards, chair rail, etc.
1
Set the miter angle at 45 degrees to the left.
2
Place the moulding top up, face out and tight against the fence of the saw
3
Make your cut with the waste side to the left of the saw blade.
5
Reposition the miter angle to 45 degrees to the right.
6
Make your next cut with the waste side to the right of the saw blade.
7
Nail into place and admire your work.
**This will cut an outside corner. To cut the inside of a corner you would follow the same instructions, only you would be using the other side of your cut. For example, in the above picture I have cut an outside corner (left piece) and have discarded the right piece of my moulding & for an inside corner you would use the right piece and discard the left piece. ***
 ~~~~~~~
Crown Moulding

 Crown Moulding is a little more complicated to cut but is definitely worth the time.
How To Cut Inside Corners
1Set the bevel angle of your miter saw at 33.85 degrees.
1Set the bevel angle of your miter saw at 33.85 degrees.
2Set the miter angle of your saw at 31.62 degrees to the right side of the saw table.
3Place the crown moulding face up with the top of the moulding against the fence of the saw table and the waste end facing to the right.
4
Make the cut. Keep the left side of the cut. Waste the right side of the cut. This is inside corner piece "A."
5Turn the miter angle to 31.62 degrees to the left side of the saw table. Leave the bevel set at 33.85 degrees.
6Place the crown moulding with the bottom of the moulding against the table fence and with the waste side to the right of the saw blade.
7Make the cut. Save the left side of the cut. Waste the right side of the cut. This is inside corner piece "B."
8Nail it into place and admire.
How To Cut Outside Corners
1
Set the bevel angle of the compound miter saw at 33.85 degrees.
2Set the saw miter at 31.62 degrees left of the saw table.
3
Place the crown moulding face up with the bottom of the moulding against the fence of the saw table and the waste end facing to the left.
4Make the cut. Keep the right side of the cut. Waste the left side of the cut. This is outside corner piece "A."
5Move the miter angle to 31.62 degrees to the right side of the saw table. Leave the bevel set at 33.85 degrees.
6
Position the crown moulding with the top of the moulding against the table fence and with the waste side to the left of the saw blade.
7Make the cut. Save the right side of the cut. Waste the left side of the cut. This is outside corner piece "B."
8Next, fit and nail into place.

~~~~~~~
Layering Mouldings
 For a beefier and more impressive moulding, I like to layer mouldings.
For my kitchen cabinets I layered crown moulding, baseboard, and a piece of decorative moulding.
First, I built up the top of my cabinet with a 1x4. I screwed it directly to the top of my cabinet and made sure it was flush with the cabinet front. I did this so that I would have a strong surface to nail my mouldings to.
Then I cut and nailed (using a finish nail gun) the (upside down) baseboard, cut and nailed the crown moulding onto the baseboard, and finished it out with the decorative moulding.