Saturday, April 24, 2010

Scrabble Board


Love this board


I don't think I am exaggerating when I say my mom has thousands of scrabble pieces this is how we can put them to good use. I would like to make one of these boards for Henry's room but use the old children's dictionaries that I just bought. The one problem, I don't have any of those power tools. I guess I need to take a trip to the Vineyard and borrow my brother's.

I love this girl's blog, Twice Remembered and you can find the tutorial to make the board there.

Wednesday, April 21, 2010

Music Sheet Dresser


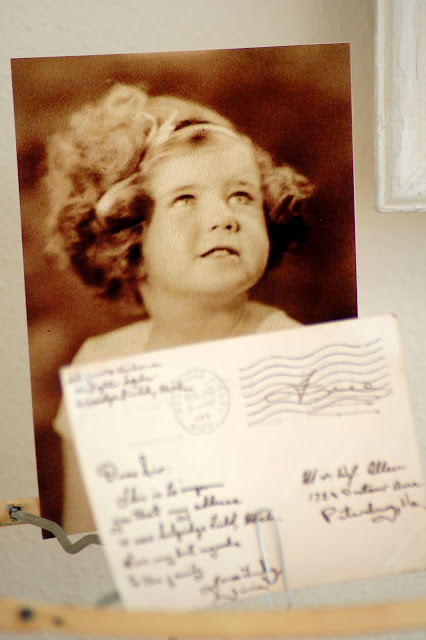
"Out of all of the entries so far, this is the one I enjoyed working on the most. Not only did I relish giving the dresser a new life, but I loved finding interesting and unexpected items from around my house for the "photo shoot." A naked lamp shade becomes a cloche for books, ironstone, and coral in addition to a display for old photos. An antique frame painted white becomes a perfect place to feature an antique christening gown and a family letter from the 1880's held in place by a starfish.
I purchased this antique dresser at an auction for $6.00 last fall. It was a beautiful bird's eye maple, so it pained me to have to paint it, but the veneer was chipped and bubbled and beyond my ability to repair. So, I had to come up with a way to cover it. Some free antique sheet music from my grandparent's attic was the perfect solution. Visit my blog for before pictures and a tutorial.
One of the keys to decorating with whites is to use lots of texture and varying tones of white and neutrals. I love the texture of this bird's nest against the smooth, bright white eggs, the gloss of the ironstone and the yellowed sheet music. A feast for the eyes.
This letter not only displays beautiful penmanship, but the age of the paper looks lovely against the crisp white frame. It was written to one of my ancestors and references her survival through the siege at Petersburg, Virginia during the Civil War.
I love old christening gowns and baby dresses, so this was the perfect time to show one off. The antique wooden hanger balances gracefully on the edge of the empty frame.
Make sure you visit my blog to see more pictures and a tutorial on the sheet music dresser."

I'm only permitted to submit five pictures and I need to keep it short, so here's the tutorial for the dresser along with some additional pictures of my entry. This is what the dresser looked like when I brought it home a few months ago. I'm sorry it's buried under other yard sale finds, but you get the idea.
It took me so long to work on this piece because I was wringing out all of my creative juices to figure out how I could save this beautiful bird's eye veneer. Some of it just needed stain and poly, but several areas were chipped, bubbled and missing. I finally faced the truth that it needed some expensive restoration or it needed to be painted. Paint is what I do, so paint it was.
But paint does not cover missing, chipping, and bubbled veneer. Mod Podge is a fairly recent discovery for me...I know, late bloomer. Vintage sheet music was the perfect solution to hide the imperfections.
I brushed the Mod Podge directly on the drawers and applied the sheet music, cutting around the key holes, knob holes and edges with an Exacto knife. I then applied a liberal coat of Mod Podge over the sheet music.
The paper is always a little bubbly when it's wet, but it dries flat, so don't think you did something wrong if you're trying this. I then applied an antiquing stain over the sheet music and one more coat of Mod Podge. I finished off the top with a coat of Wipe On Poly to make it water resistant.
The rest of the dresser was primed in a Sherwin Williams' bonding primer and one coat of latex semi-gloss ProClassic paint in Creamy. I hit the edges of the dresser with a sander and applied an antique glaze.
I love the original wheels on this piece and how the yellowed sheet music is framed by the white on the body of the dresser.
Here are some additional pictures of the items in the arrangement on and above the dresser.


I hope you enjoyed looking at this post as much as I enjoyed putting it together.


Shutter headboard


SYTYCD Week 3 "OLD"Headboard

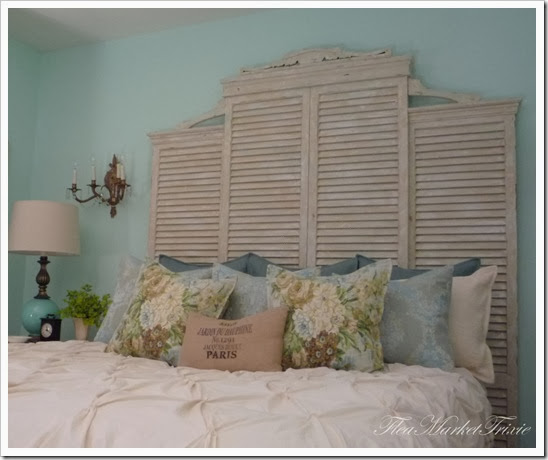
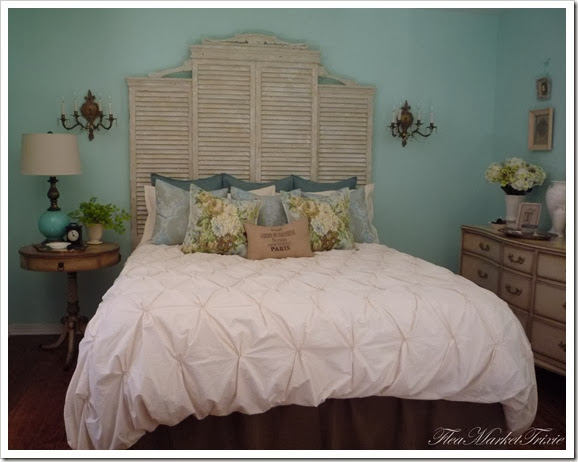
For this week's category "old", I wanted to show the headboard I made using a vintage settee and vintage closet doors.
P1020699c
The cost of the entire project was around $10.00 dollars, $6.00 for molding, $3.00 for settee, free closet doors, free scrap molding and leftover house paint.
P1010922
P1010915
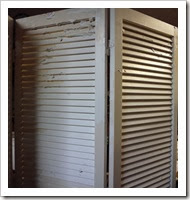
This is what the doors and the settee looked like before they were transformed into the headboard.
I used the back and the arms of the settee for the top pieces.
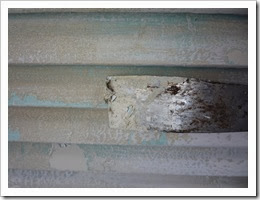
I used several paint colors to achieve an old weathered paint look. I scraped away some of the paint in certain areas using a putty knife, revealing the underlying paint color.
P1010918


This is how it looks in my newly decorated bedroom, I made all the pillows, using new and vintage fabric and I'm really happy with the way it turned out.
P1020703a

They are super easy to make and rather inexpensive. I purchased 1/4” grosgrain ribbon and 3/16” dowel rod. I wet the ribbon and tightly wrapped it around the dowel rod using a wooden clothespin on the ends to hold the ribbon in palce.IMG_1934I baked it at 250 degrees for 20 minutes. After it cooled I pulled it off the dowel rod and cut it into little korkers.

At this point take a lighter to each end to singe it so it won’t unravel.IMG_1935

I took about 8 of the cut korkers (mix and match colors or use all the same) and stacked them together and tied some thread around the middle of them.

IMG_1938Then I hot glued some ribbon to an alligator clip (this step isn’t necessary - I just like the finished look).

IMG_1939Hot glue the korker bow in the middle of the ribbon wrapped alligator clip…

IMG_1940Cut a small scrap of ribbon to wrap around the middle…

IMG_1941Hot glue in place wrapping the ribbon under the top of the alligator clip…

IMG_1942Then clip them in your little girl’s hair. Adorable on little piggies!


Wednesday, April 7, 2010

THURSDAY, MARCH 04, 2010

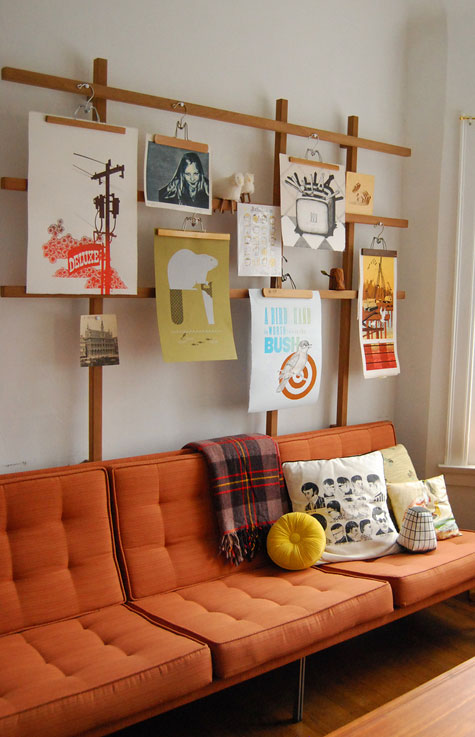
Unique Gallery Wall


I love this space from Ladies and Gentlemen Home. The art hung with old vintage hangers on a grid makes for a killer gallery wall. So creative and casual. Maybe even instead of making a grid hanging an old painted ladder? Two thumbs up, L & G!

family tree chart

Family-Tree Fan Chart

14 Ratings (See All) | 23 Comments (See All)

We exist today because countless generations of ancestors met, married, and had children, yet we often know little or even nothing about them. As you begin exploring your past, you may discover an ethnic or a national heritage you never knew about, find a family name to give to a new baby, or just explore how your own story fits into the American epic.

Chart How-To
1. Download and print thetemplate onto 8 1/2-by-11-inch paper. For a bigger chart, copy it onto 11-by-17-inch paper at 175 percent. For a 16-by-24-inch chart, copy half of the 11-by-17-inch chart at 125 percent; repeat for other half. Carefully tape enlarged halves together to form template. Go over the template's lines with a permanent marker; then trace them with pencil onto a sheet of paper thinner than card stock (you could tape the template to a window, center the paper on top, and lightly draw lines with a pencil, using a ruler if necessary).

2. Begin by calligraphing your name and birthdate; then proceed to your parents, grandparents, and so on, incorporating dates when you can. Don't worry if you make a small mistake; if you want to undo any calligraph, gently scratch it away using a utility knife or a razor blade. Be careful not to cut through the paper.

3. Frame the finished product with colored paper behind it to create a decorative border, or take it to a frame shop.

Calligraphy Guide template

punch collage

Weekend Creative : February #2 : punch collage

Weekendcreative_3
Creativeweekend_punch2

This weekend's project is inspired by Margaret's heart collage (just right for Valentine's Day) and Australian artist Catherine Swan's beautiful paper butterflies (read more of her story + see the size of her art here). I originally discovered Catherine's work through Oh Joy.

Repetition is one of my most favorite principles in design and punches are one of my favorite products. I use punches to create repetition all the time when creating scrapbook layouts + minibooks (especially using that square Giga punch ). This new little collage will be replacing my holiday collage that has been above my sink since November (will be storing the collage with my holiday stuff + will pull it out and stick it back in the frame for next year).

This collage was created using a Martha Stewart butterfly punch and a variety of different scraps of paper: junk mail, scrapbook paper, pages from old books, etc. My white sheet of background cardstock was cut to 10x8 to fit into the mat of the black frame. I used tiny foam dots as adhesive. There's no real method to choosing which papers to use - I tend to go for a balance between text, lines, dots, etc.

The basic prompt: create a collage (or a scrapbook page) using two things (1) a punch of some sort and (2) the principle of repetition to bring it all together. Here's some additional punch shapes if you are looking for something to add to your collection: heart, star, postage stamp.

Creativeweekend_punch1

Have a great weekend!